SignBox User manual
Introduction
SignBox is an application to manage e-signing processes and collect signatures easily and in a secured manner. SignBox is part of TrustLynx product offering, and it allows users to initiate and administer e-signing processes and accordingly access and approve, deny, or sign documents using qualified electronic signatures.
In this video you can see SignBox application in practice. Please press Ctrl+Click to follow the link if embedded video is not working in your application.
SignBox user interfacing parts and notifications are adjusted to every company's visual identity to make the user experience homogeneous and aligned with your company's identity.
All documents that are processed using SignBox are managed under sole control of your company within your company's firewalls.
TrustLynx operates in accordance with eIDAS regulation that lays down the rules for digital trust services.
Signing initiation page
Welcome to the SignBox main menu! This is where users initiate and configure signing processes. To simplify initiation of signature collection processes, it is possible to automatically submit data about signers to SignBox from other systems such as HR, CRM, board meeting management etc. Share this info with your respective colleagues who are responsible for those systems and maybe you find a great way how to automate and even further simplify the process.
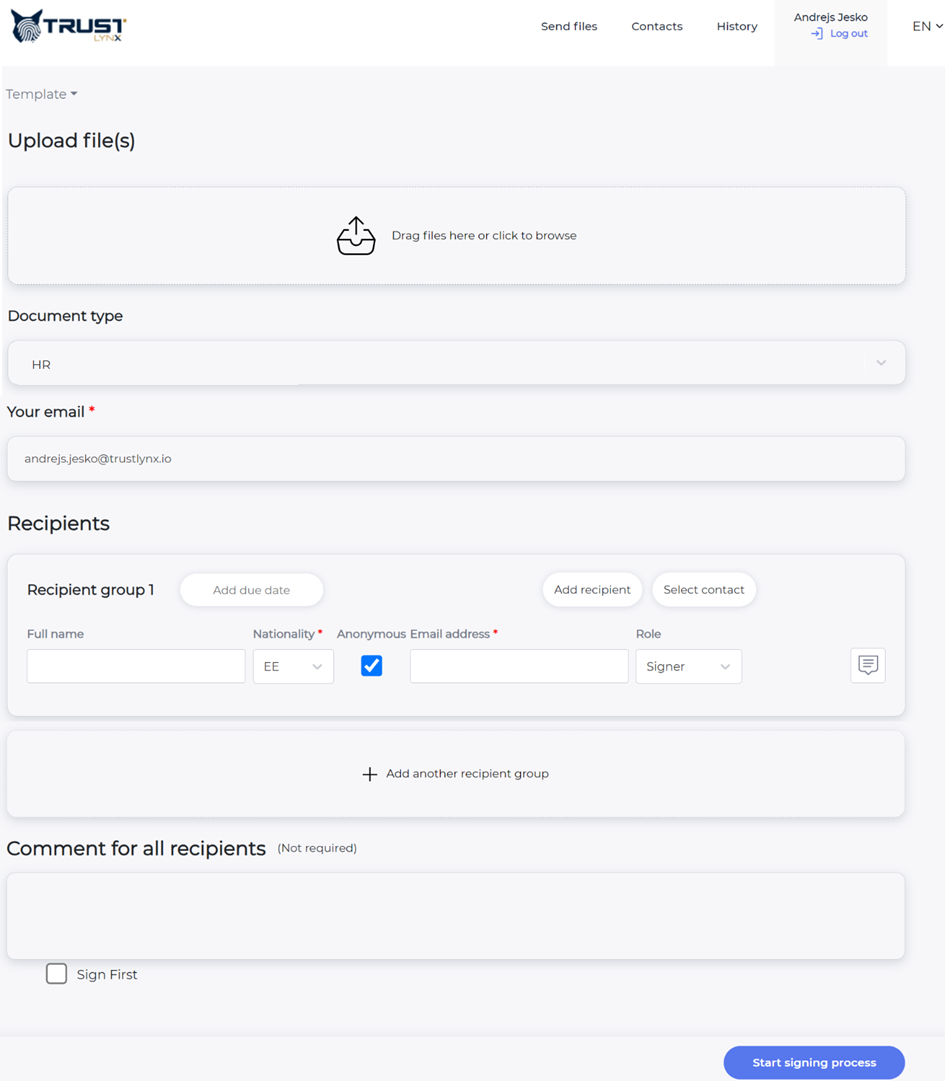
The following fields are available to users:
- Upload file(s)
- Document type selection (configurable)
- Initiator’s email
- Recipients’ details (name, nationality, anonymity, set role)
- Setting due date
- Adding recipients or recipient groups
- Adding recipients from the Contacts list
- Using pre-saved Templates from the Templates list
- Adding individual or group comments
- Enabling “Sign First” functionality
In the following subsections we are going to look at how to set up a signing process and take full advantage of the available features.
Initiating a signing process
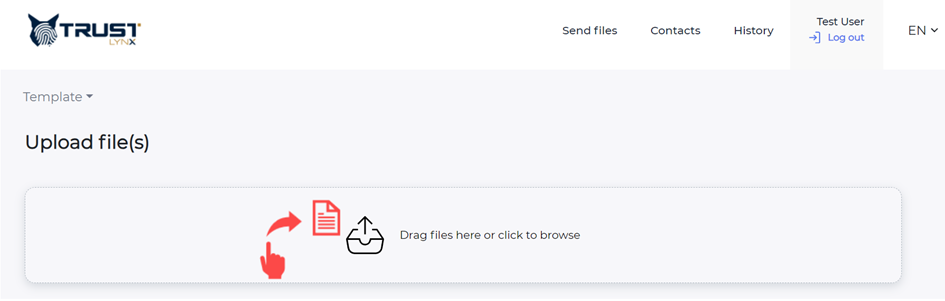
Upload file(s). First, let's start by adding a document for signing, - simply drag-and-drop the necessary document or click to browse your file directories.
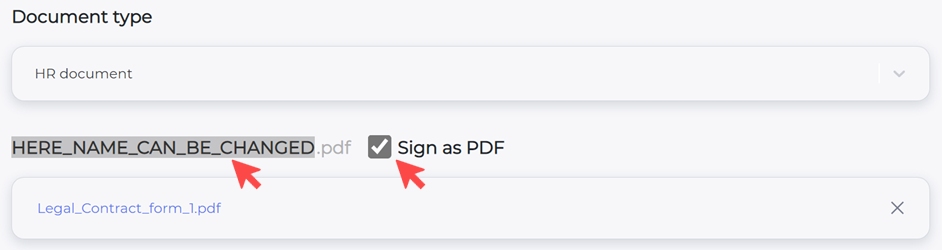
It is possible to upload more than one document that will be signed as one document container. If uploaded only one document and document type is PDF than by clicking on "Sign as PDF" box (see screenshot below), it is possible to sign the document as PDF file. In all other document type or amount cases "asice" container will be created and files added as attachments inside the container. Uploaded document name will be visible as an additional line (now-container name) and the name itself can be changed before launching the signing process by clicking on the container name (see greyed area in the screenshot below).
Selecting a document type
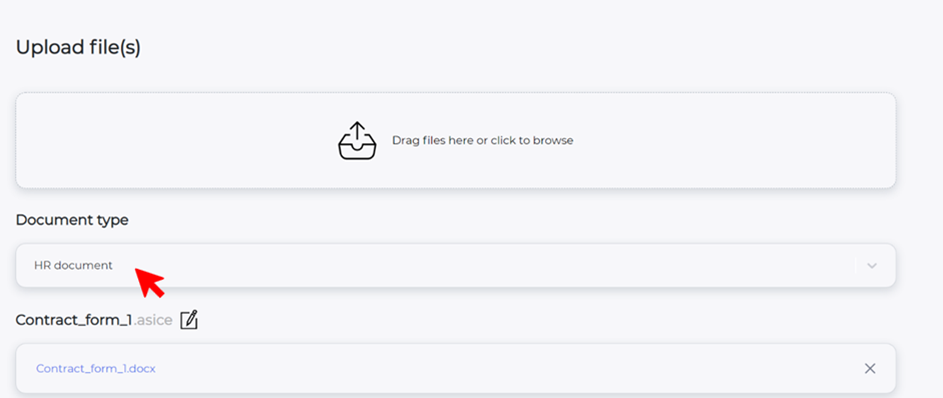
Document type. Various types of documents have unique approval and archiving processes.
Select a document type to instruct SignBox how the file must be handled. SignBox archives documents according to previously defined logic for each "Document type" to reduce manual work. If in your SignBox configuration is only one "document type", users will not be offered this input field.
Recipient configuration
Recipients and Recipient group. Recipient selection functionality and filling in required information is described in following subsections.
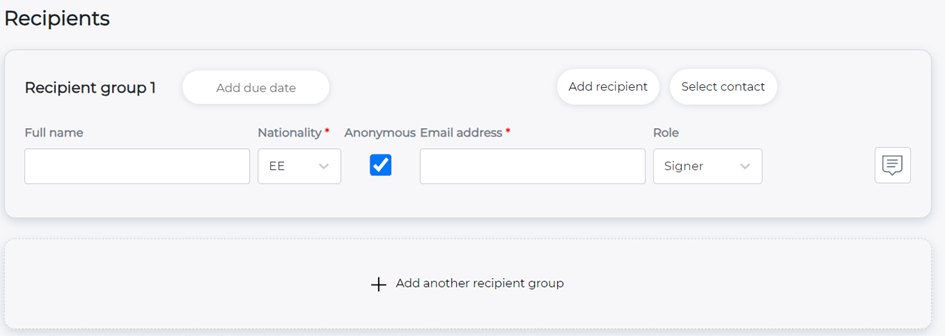
Adding recipients information
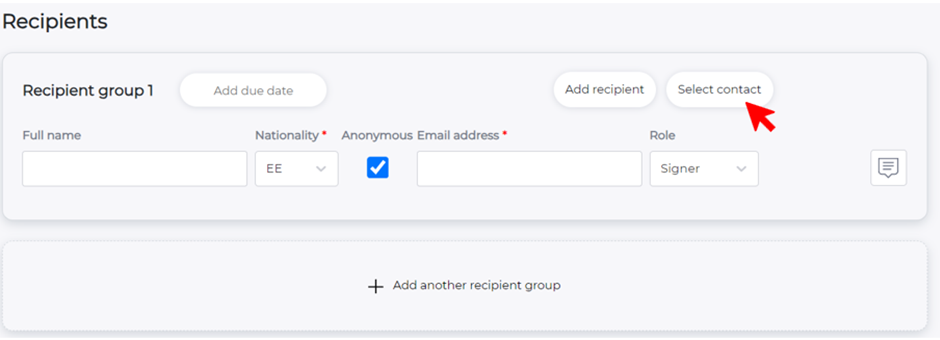
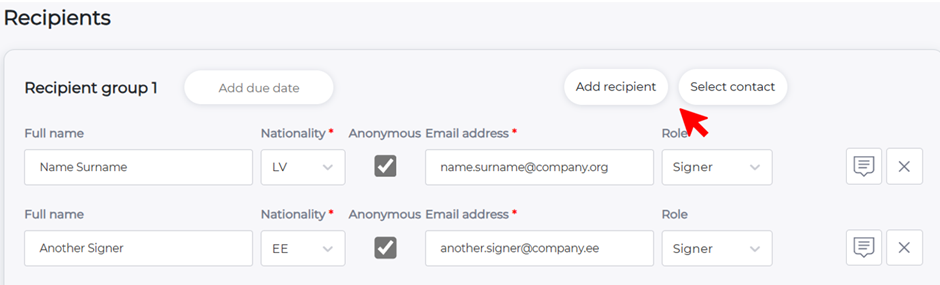
To launch successful signing process you need to fill in all the signatory information: name and surname, select nationality from the dropdown, untick the "Anonymous" box if additional security needed, fill in an e-mail address and set the role for the recipient. In some cases the person's information can be already pre-filled from your system if SignBox has been linked to your leading application. Please contact your system administrator if that could be a case. Alternatively recipients can be added using pre-saved contacts list by clicking “Select contact” as seen below.
Nationality field
SignBox uses the nationality field to determine the correctness of the Personal ID number if non - “Anonymous” functionality is being used.
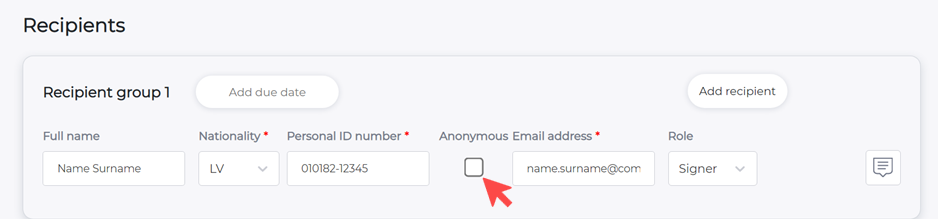
Anonymous – on/off
In situations that require the highest trust, untick the "Anonymous" box and enter the recipients' personal code. This adds an extra layer of security and ensures that only that selected recipient can access the document.
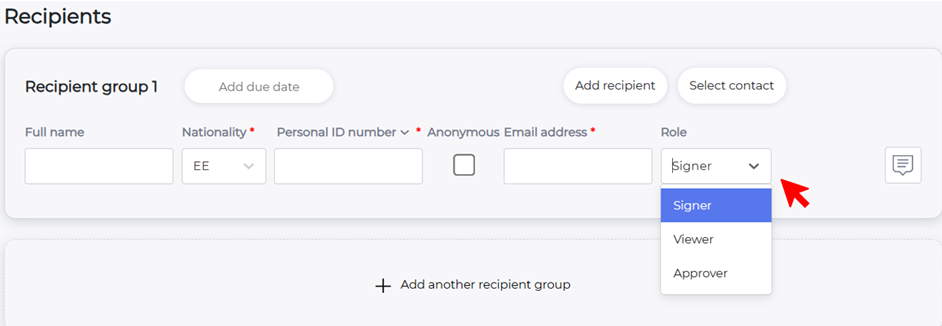
Selecting process roles
There are three available roles that recipient can be assigned:
- Signer – able to sign the document and follow the signing process.
- Viewer – only able to view and follow the signing process.
- Approver – able to view and approve the document (without signing) and follow the signing process.
The available roles for your company are configured according to your company's needs.
By default, all recipients are set as Signers.
Several recipients at once
Click "Add recipient" to add more people to your process. They will be able to sign the document at the same time, without any specific order.
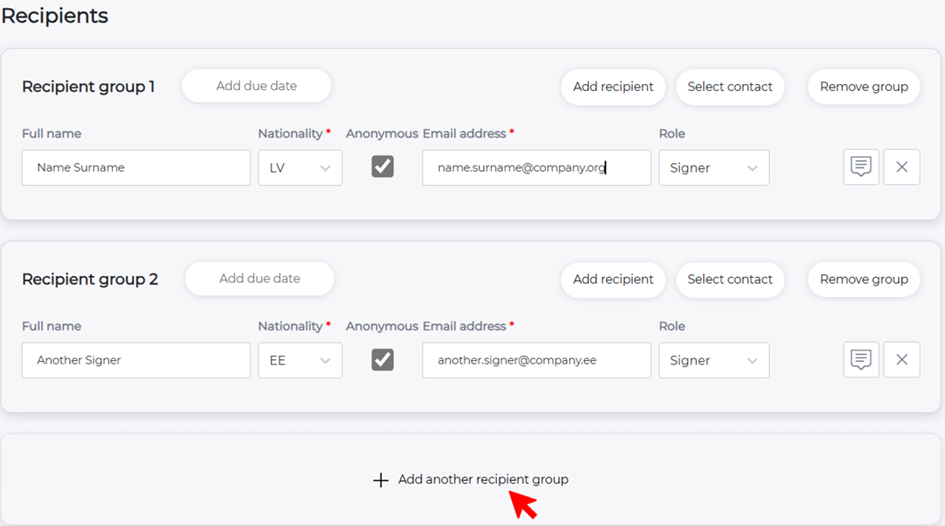
Sequential signing
Click "Add another recipient group" as seen in the screenshot below to enable sequential signing. Other recipient groups will be able to sign the document only after previous groups have signed it.
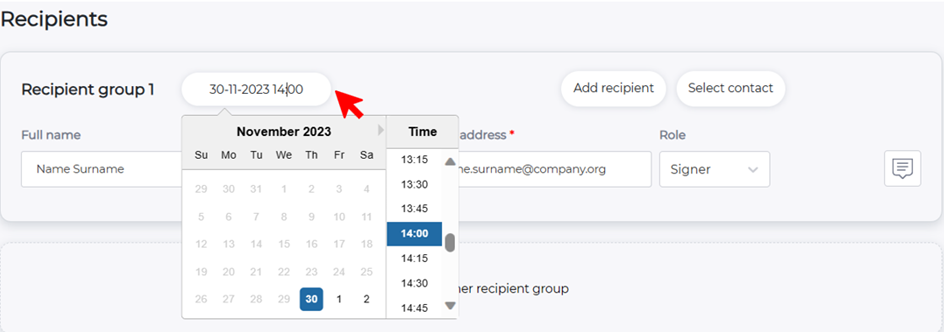
Due date selection
Set a deadline by clicking the "Add due date" field. With the due date approaching, recipients will receive a reminder e-mail to sign the document.
Adding comments for recipients
It is possible to add individual comments for each recipient separately and joint comment for all recipients.

Individual comments
To add individual comments, click the icon next to the respective individuals' details as shown in the screenshot above.
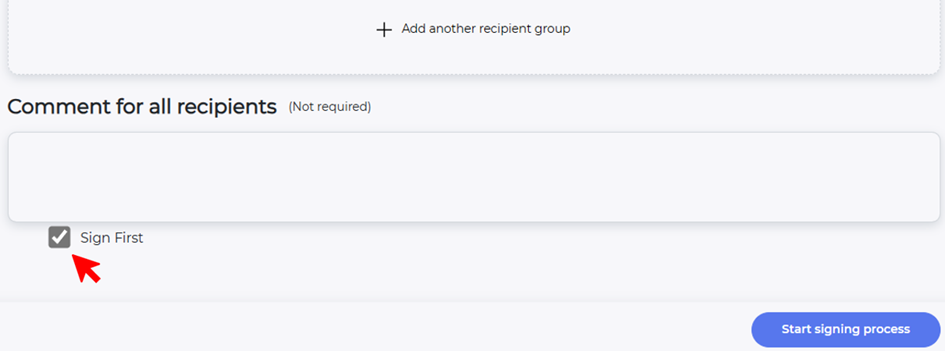
Comment for all recipients
Inform all involved parties by adding a universal comment under the field " Comment for all recipients" as shown in the screenshot above.
Sign First – signing by Initiator
Before launching a signing process, it is possible to enable functionality for the initiator to sign the document by themselves. The activation happens by clicking on “Sign First” as seen below.
Launching a signing process
Signing process without “Sign First” activated
After all necessary details are entered, launch the process by clicking the “Start signing process” button. An e-mail invitation will be sent to all added recipients. If there were several recipient groups, then each recipient group will receive an e-mail invitation only after the previous group has finished the signing process.

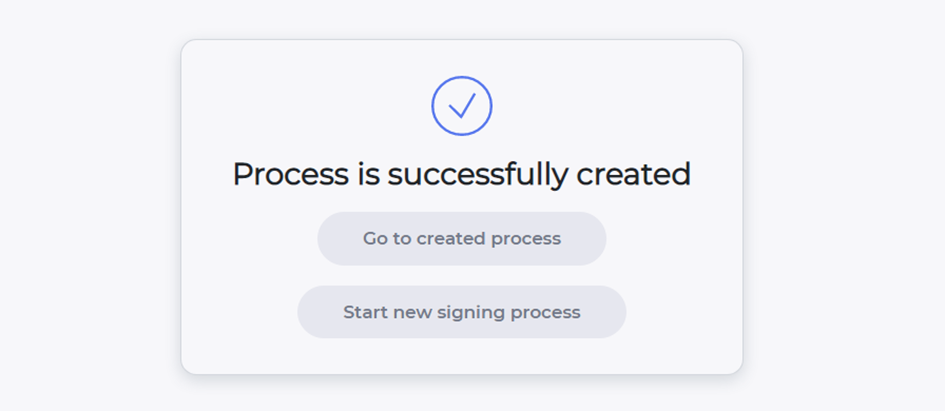
After finishing signing process creation it is possible to start a new signing process and/or follow the progress of started processes.
Signing process with “Sign First” activated
If the “Sign First” functionality was enabled, then after clicking the “Start signing process”, you will be redirected to the signing page where predefined signing tools are available, and you will be able to overview and sign the document by choosing your preferred signing method.
After finishing signing process creation it is possible to start a new signing process and/or follow the progress of started processes.
SignBox Contacts and Templates management
For your convenience and ease of SignBox usage, SignBox functionality allows to create a list of frequently used contacts, and to save pre-filled initiation page templates for repeated usage in the future.
Contacts management
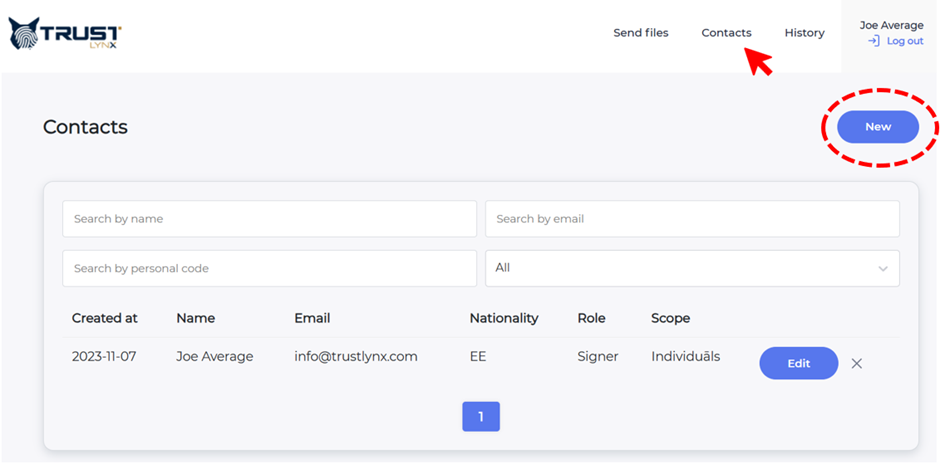
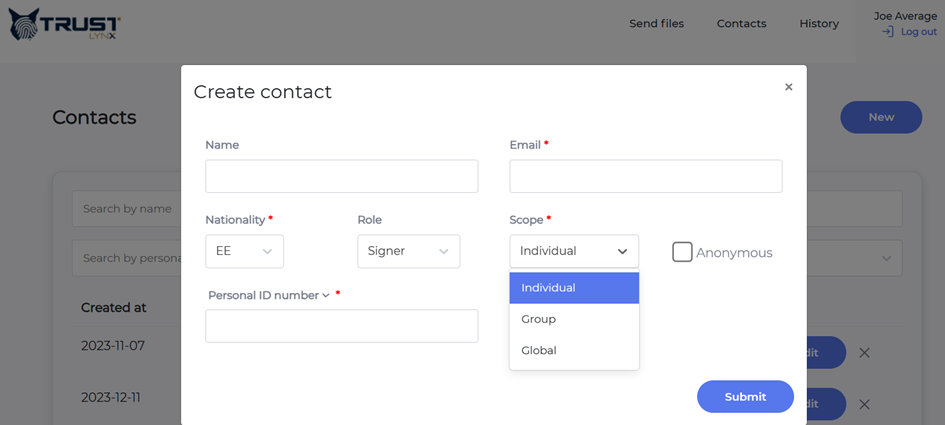
Contacts management functionality is provided in “Contacts” section. By selecting “New” you will be able to create new contacts in your list.
For creation of a new contact the following fields shall be filled:
- Name
- E-mail of the contact
- Nationality -needed for ensuring the correctness of the Personal ID number if “Anonymous” functionality is being used.
- Role (Signer, Viewer or Approver) – this role will appear as default when the contact will be selected but can be changed during initiation process according to your needs.
- Scope (Individual, Group, Global) – choose who from your company will have this contact available.
- Individual – only you will see this contact in your contact list
- Group – only specified Group members will see this contact in their contact list
- Global – all of your company SignBox users will see this contact in their contact list.
- Personal ID number – in case the non-Anonymous functionality will be used.
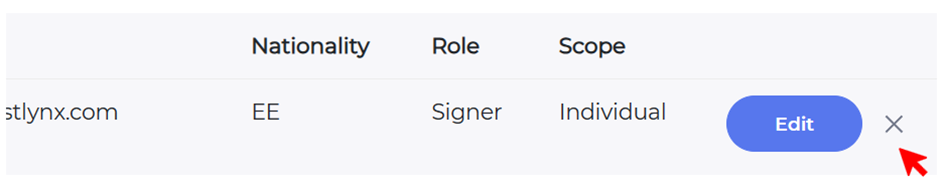
It is possible to filter/find the created contacts by:
- Contact name
- Contact e-mail
- Contact personal code
- Scope (Individual, Group, Global)
You can make changes to existing contact by using “Edit” button from the right-side column, as seen below. To delete the contact from the contacts list, use “X” on the right-side from the “Edit” button. You will be asked to confirm or deny deletion of the contact.
Templates management
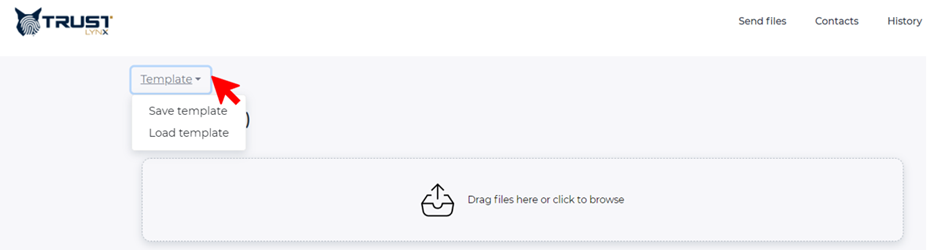
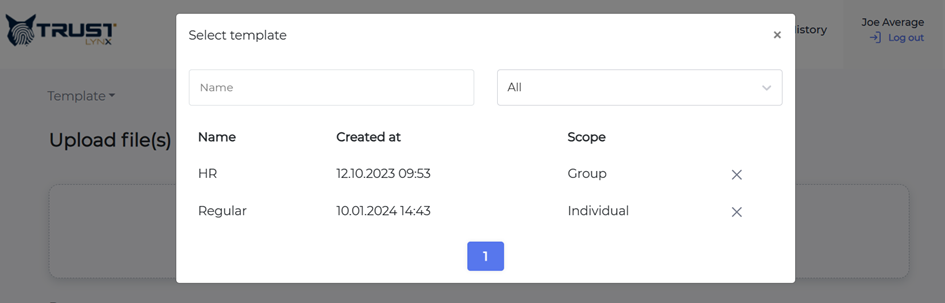
Templates management functionality is provided in “Template” section on the top-left side of the SignBox process initiation page as shown below. Templates is a handy tool in cases where you regularly need to initiate processes involving the same recipients and process flow.
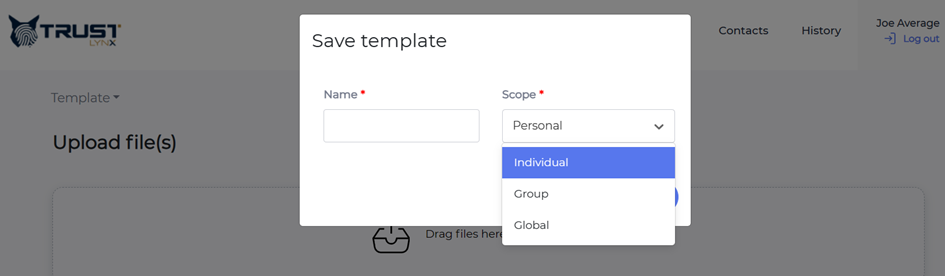
You can always save a new template after recipients’ information has been filled and before the new process has been initiated. By selecting “Save template” you must create a “Name” of the template and choose a “Scope” thus stating who will be able to use the same template for their signing processes.
To load an existing template, choose “Load template” from the “Template” tab. You will have possibility to search/filter existing templates by the Name and Scope. To delete the template from the list, use “X” on the right-side from the template list. You will be asked to confirm or deny deletion of the template. To load and start using the template, simply press on template and all its data will be loaded to the signing process initiation page. You can always make changes to pre-filled information and add additional data if needed.
How to sign a received document?
In the following sections we are going to the signing process from recipients' point of view.
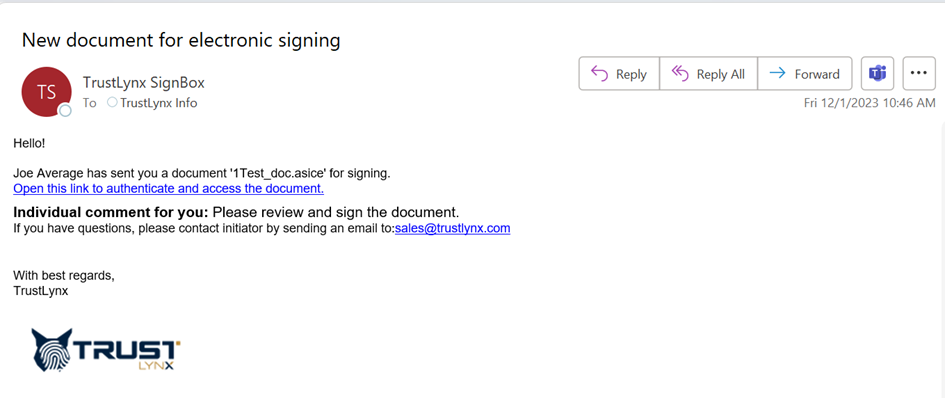
E-mail invitation to sign documents
View your e-mail inbox and open the invitation to access the document via SignBox.
Here you can see the most important details before taking any further actions.
The visual aspects of the e-mail are adjustable to suit your brand identity.
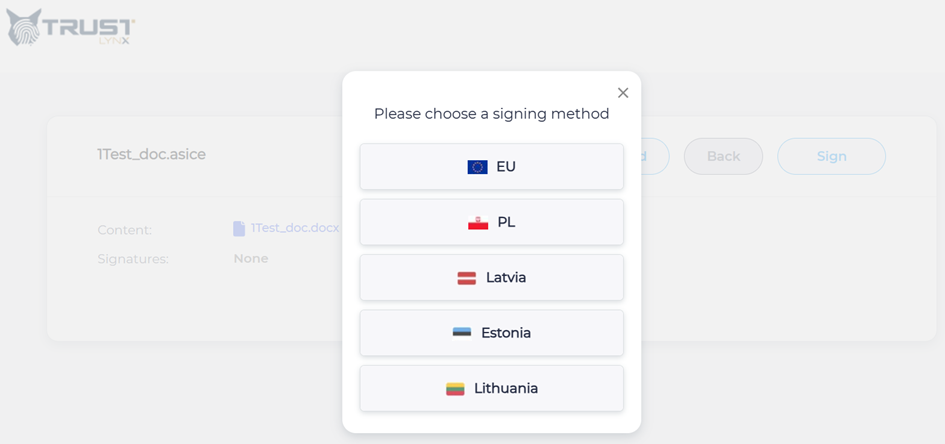
After pressing the link, you will be redirected to SignBox authentication page where predefined signing tools are available according to previously set nationality field. Only after authentication you will be able to overview and sign the document.

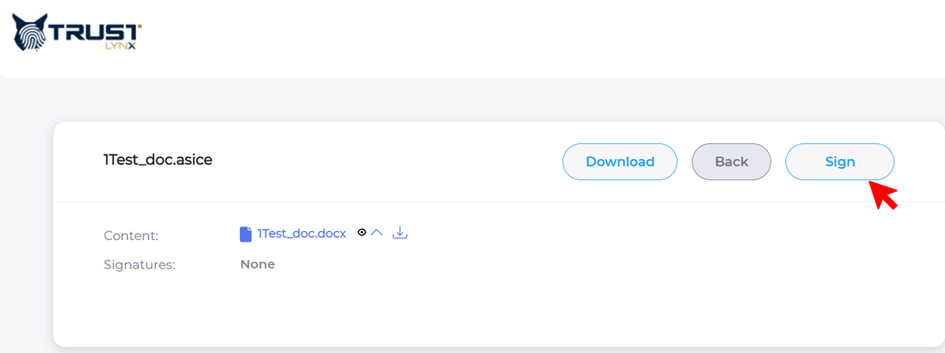
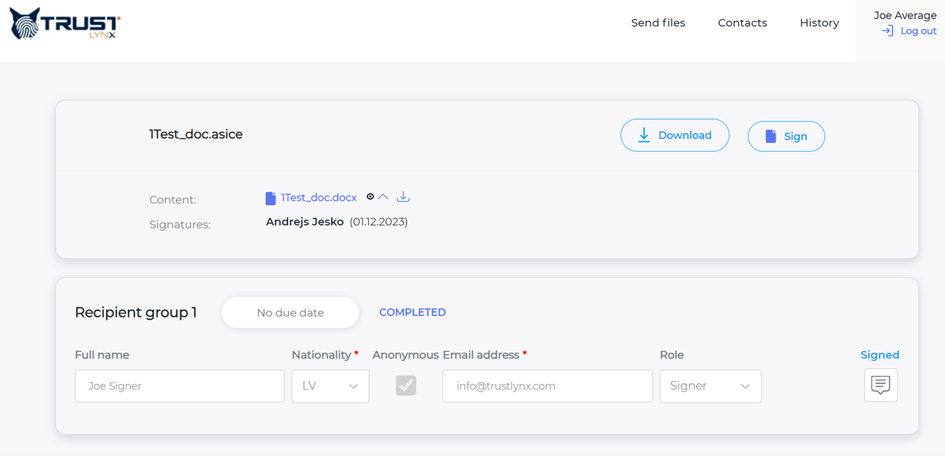
Document overview in SignBox
Before signing the document, you can view individual and general comments if there have been such added, existing signatures (if there are any) and preview the original document without signatures.
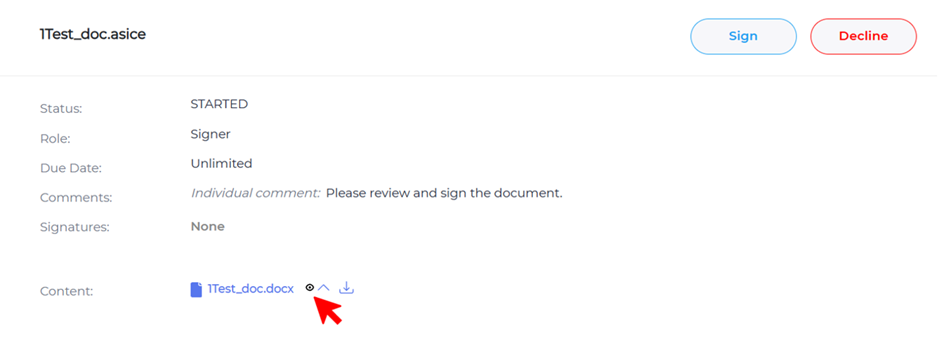
View original document
Click on the document name (shown in blue color, see picture above) to verify the content of the document you’re about to sign. The document preview will be opened. Alternatively you can download the document and inspect it in your native application or according to your device settings.
Sign the document
Initiate document signing by clicking "Sign" on the top-right corner of the application.
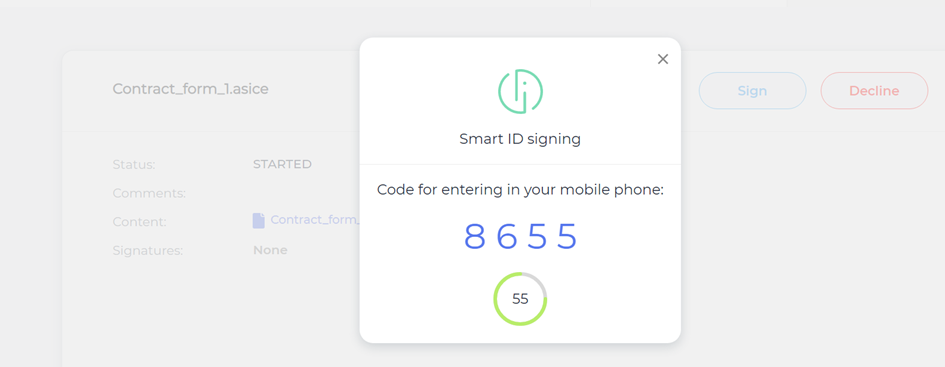
The act of signing is confirmed via your preferred digital identity tool.
For example purposes, see the screenshot below to see how a signature is confirmed using Smart-ID – the user confirms his action by entering the PIN on his Smart-ID phone application.
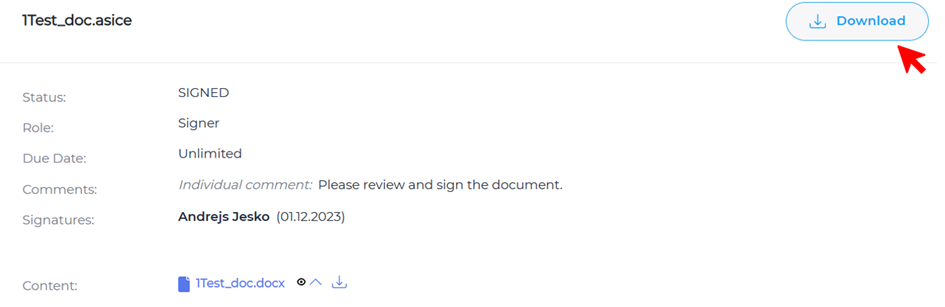
After the signing process is finished, it is possible to download the signed document. Also, signer’s details (name and date) are added in the field “Signatures”.
Decline the document
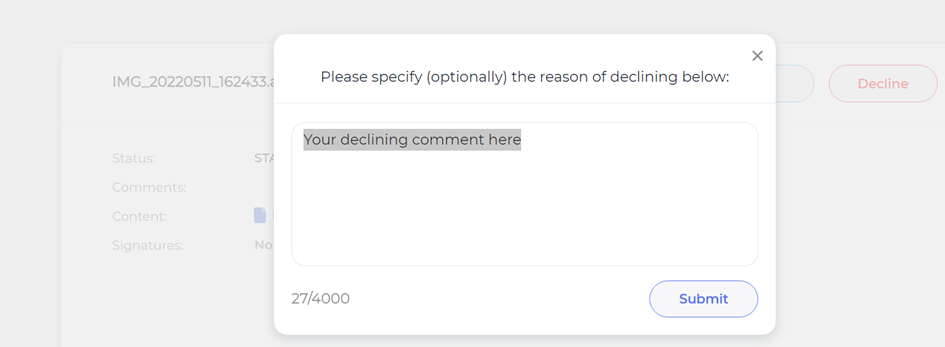
Cancel the signing process by clicking "Decline document" on the top-right corner of the application. The comment field will pop-up allowing you to add necessary comments regarding your decision. The declining message will be sent to the signing process initiator.
Follow the progress of your signing processes
Access to related documents and history
You can view all existing signing processes that are related to you from the History tab in the main menu, as shown in the screenshot.
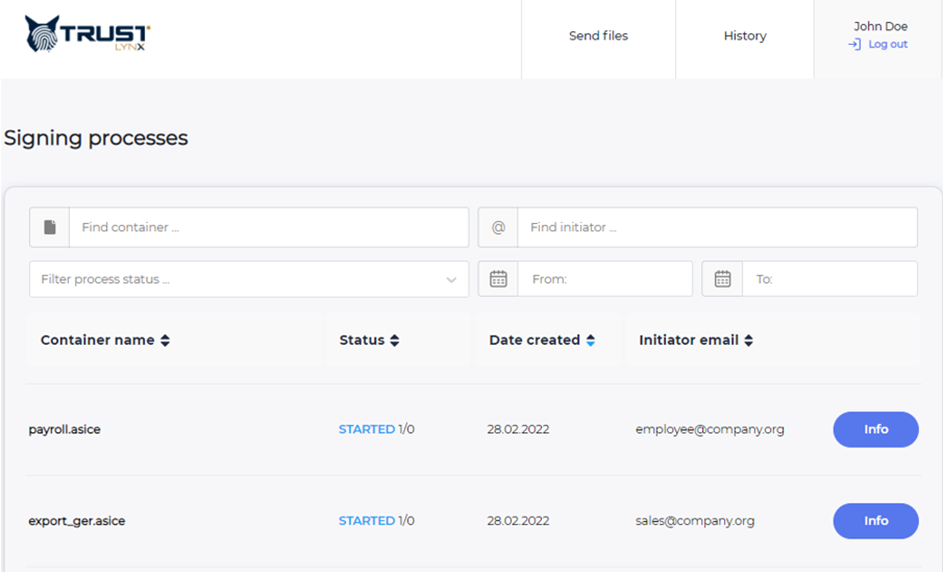
It is possible to filter the signed documents history and ongoing signing processes using content filters by: • Container name • Process initiator name • Process status (pending, started, completed, cancelled, declined) • Date intervals • Document type, if such has been added during the installation process at your company. You can access more details about each document via “Info” button from the right-side column, please see next section.
Overviewing document progress
After clicking " Info" from the previous menu, you gain access to all related details concerning specific process.
From here you can overview signing status for each individual, as well as download the signed document with all signatures.
Making changes to unfinished/ongoing signing process
In case of started signing process which has not been completed yet, it is possible to make following changes to the process:
- Add another recipient or recipient group
- Decline previously added recipient or recipient group that still has not signed the document
- Add, change or delete comments to recipients and recipient groups
- Change due date information
- Change the roles of recipients
- Untick the "Notify" box in case you do not want to send an update e-mail to certain recipients (see the screenshot below)
- Cancel signing process.

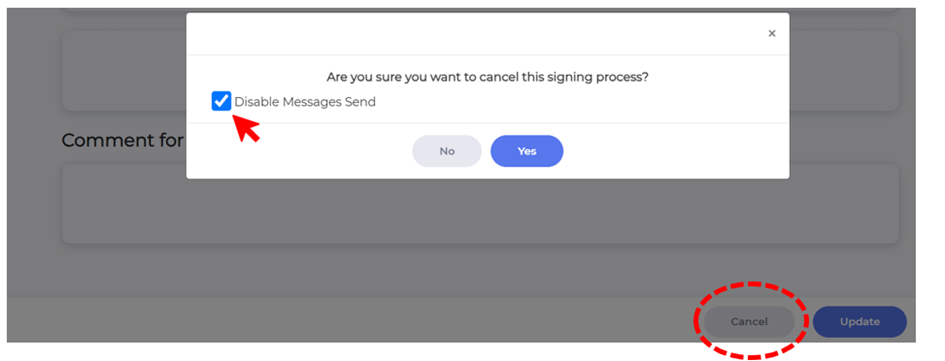
In case of the cancelation of existing process press “Cancel” at the bottom of the page. During cancelation you can choose if involved recipients will receive a notification regarding process cancelation. To disable sending notification, click “Disable Messages Send” as seen below.
Deleting the process from the History
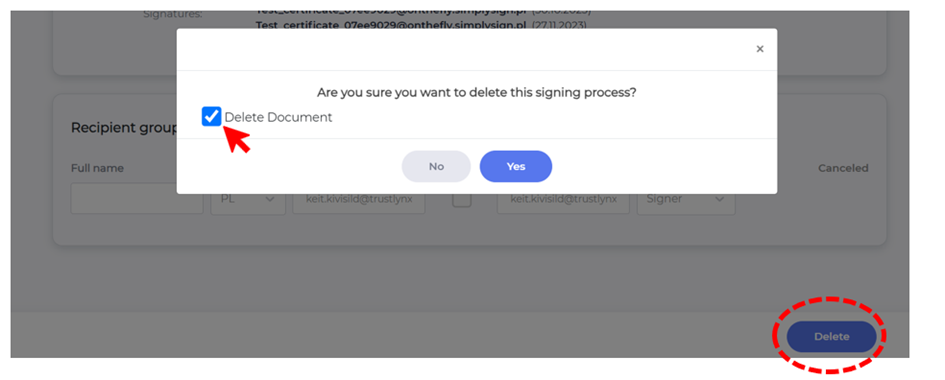
You can delete the processes from the History tab. It is possible only for completed processes with statuses: Completed, Cancelled or Declined. To delete the process from the history, press button “Delete” at the bottom of the process as shown below, where you can confirm or deny deletion of the deletion process. You can also choose to complete delete the document from the archive destination by clicking “Delete Document”.
Frequently asked questions
_ I started new signing process and during the process all the information that I have entered have disappeared __ . _
Probably your signing initiating process took too long as due to information security reasons the system after certain time (e.g. 10min) refreshes itself. Please restart your signing process by re-entering all the necessary information.
_ I have not received any email notification regarding started signing process __ . _
Please make sure that the signing process initiator has used the correct email address. The process initiator can always update the signing process details while the process is ongoing.
_ I cannot log-in to SignBox portal. _
Please check if you have any of the authentication and signing means - the list provided is based on the available signing means for the national identity that you have chosen and that are supported by TrustLynx. If you have the signing mean (e.g. eID card or qualified Smart-ID account or MobileID) and still cannot access document, please verify with the sender if you are the nominated signer for the document you are trying to access.
_ Smart-ID does not allow signing in. _
To sign documents, only qualified Smart-ID account is accepted. Please check if you have the qualified Smart-ID account: https://www.smart-id.com/help/faq/general/can-use-smart-id-sign-documents-electronically/
_ eID card does not allow signing in. _
SignBox do not require any additional components for users to use their eID cards for authentication and signing. Please make sure you have prepared your computer for using your national eID from web-browser. If your eID signing option works from web-browser but you still cannot access the document, please verify with the sender if you are the nominated signer for the document you are trying to access.
_ Will I have to pay for signing using SignBox? _
Use of SignBox for end-user is free of charge.
_ How are the data and files shared with me using SignBox managed? _
The information and files that you can access, sign and download using SignBox is solely controlled by and in accordance with the regulations of the organization who shares the data and files with you or in whose online portal you are signing information. For any requests of where the data is stored and archived, please turn to the Company.
_ Who can access the data and files shared with me using SignBox? _
Only the persons who are nominated as signers of the document and persons - employees of the Company who request the signing - who are authorized to manage the document.
_ Where can I check the required settings and configuration for my signing means? _
Instructions of setting up authorization / signing devices:
E-ID: LV, EE, LT Mobile ID: Open Smart ID: Open
_ What are the supported operators for Mobile-ID? _
EE: Elisa, Tele2 and Telia LT: Bite, Tele2 and Telia
User and access management
Please contact your company's system administrator specified in contact information in case of:
- Create new user rights
- Change existing user
- Cancel existing user
- SignBox malfunction detected
- SignBox existing fields configuration needed according to your company's specific needs
- Integration and extension possibilities to enhance other systems with signing and/or signature collection capabilities
- Other user questions or assistance needed
All the SignBox user information, access rights and needed changes are configured by your company's system administrator.
All the SignBox installation and configuration information, e.g., relevant technical documentation is available to your company's system administrator.
Contact information
Company's system administrator/helpdesk contact information: support@trustlynx.com
Please contact SignBox solution experts from TrustLynx in case there are topics that are unclear on not covered in this user-manual and your system administrators are not able to solve your questions.
SignBox solution experts will help you or make sure the topic is resolved with required assistance and attention.
Reach out to your contact person or SignBox solution experts: info@trustlynx.com